
There is a lot of difference between how authors outline and write their book.
Now, a lot of people approach writing a book like this:
Have an idea, start brainstorming, attack it with gusto, have too much content, rearrange it, hire an editor, they do a huge review and two rounds of changes, finally mould a final book, find an angle, hope it sells.
I used to be one of those people, so hey, I get it. But then I thought, what if I put some planning and niche research into those steps… would that help? Commercial thinking from the start?
In my book coaching, I go through a three-step method with clients where they use basic skills and draw on their knowledge.
Step 1: Book Research. Find an angle that is a small gap or difference to other books on topic. Ask yourself questions. Determine reader type and purpose of book.
Step 2: Brainstorm and mind map your topics. With video assistance, this stage is where you are coming up with the topics to form chapters, and sub-topics that form sections of those chapters.
Using the power of colour and icons, Mind Mapping the Tony Buzan way is a fantastic way to organise information on a page. I use A3 and color felt pens.
Step 3: Outline. In a Google Docs draft, write the outline and summarise each chapter. Decide here on the length of the book and then the length of each chapter. You could also use Scrivener, if rearranging sections and using references. Bit unsure of what sections to include? Here is a simple example:
Foreword by expert (optional)
Preface (optional author’s note on surrounding issues and why this book)
Introduction
Chapters 1 – 10, for example
Conclusion (go over the key points or steps again to get the most from the book)
Step 4: If research will be part of your book, start collecting cool ideas and research results. Look at comparative and competitive books and find the gaps.
Start writing with the research, quotes, and creative ideas, on the topics in each chapter. Be mindful of structure. See if you can add useful reader resources in some of the chapters.
Step 5: Self-editing. Check chapter lengths. See if the creative content is on par with original reader wants and needs.
Step 6: Feedback. Get beta reader feedback and integrate what seems right to you.
Step 7: Take a fresh look, make it as logical a flow as possible, also check if the voice is consistent.
Step 8: Send to editor for their copy editing work
Step 9: Integrate the editor’s comments and finalise. Fact check/Copyright check.Step 10: Typesetting. Send for formatting or do it yourself, if you know about book layout.
Advantages of Writing a Book with an Outline & Purpose First
When you do valid research and tap into what readers are really looking for in the initial stages, you’re not just starting from your mind. This information can start to influence all the content of your book and even the length or complexity of the book.
Have you seen the Blue Day book? It’s a short, coloured book with lots of lovely quotes designed to mentally pick you up. It’s a bestseller that found a tiny gap in the book market.
Writers, if you want to have helpful multimedia resources that inform about the stages of creating a new book and marketing it, see Book Creation Self-Publish course.
Dummies guides are usually 90,000 words and are of a certain format, to break up the points, but there are people who are daunted by that long a book. For them, it’s better to get three easy-to-start ideas from a small book. They might prefer a step-by-step type book that is clear and uses the author’s experience of the topic area.
Another advantage of doing your research up-front is of course you are going to be writing on the right topics: the ones that readers want to read but are currently complaining they are not getting from other books.
STEP 1: ASK QUESTIONS
In Step 1, I mentioned you need to ask yourself questions. These are:
- Do I live and breathe this topic, so it will be easy for me? (Or say, for history/biography, can I research easily enough?)
- Will I be wanting to talk about this area in speeches for one or two years?
- Does this topic and my thesis/angle make me feel like I’m contributing something fresh to the world?
- Will the writing of this book lead to some greater things, perhaps some joint ventures?
AUDIENCE RESEARCH
After some thought, you might have some things people have said they wanted. But what about misconceptions in this area? And what does your typical reader think of social media? Do they read the news? Are they left or right leaning? Would any of their kids, should they have them, be sent to private schools? The more you know your readers, the better off you are.
You can write out a half page now on your Typical Reader Profile.
Now it’s time to write a purpose statement for your book. There are often myths that you can set about dispelling. Or there might be something even more controversial you can uncover. Just a few lines to unpack the real reason the book you intend to write is needed. Feel free to get impassioned!
STEP 2: BRAINSTORM
First go big with as many sub-topics as you can and then narrow down your topics in line with an angle and intended audience’s needs. If it’s a history book or biography/autobiography, then you will probably map out ideas in a chronological manner.
These two steps can be done in the same sitting. It can be done on paper, with thin colour pens, e.g. Artline.
Create an icon in the middle plus your topic. (See my little guy below). Make the branches curvy (Tony Buzan calls it curve-linear) and let you mind fill in the subtopics naturally from the head idea.
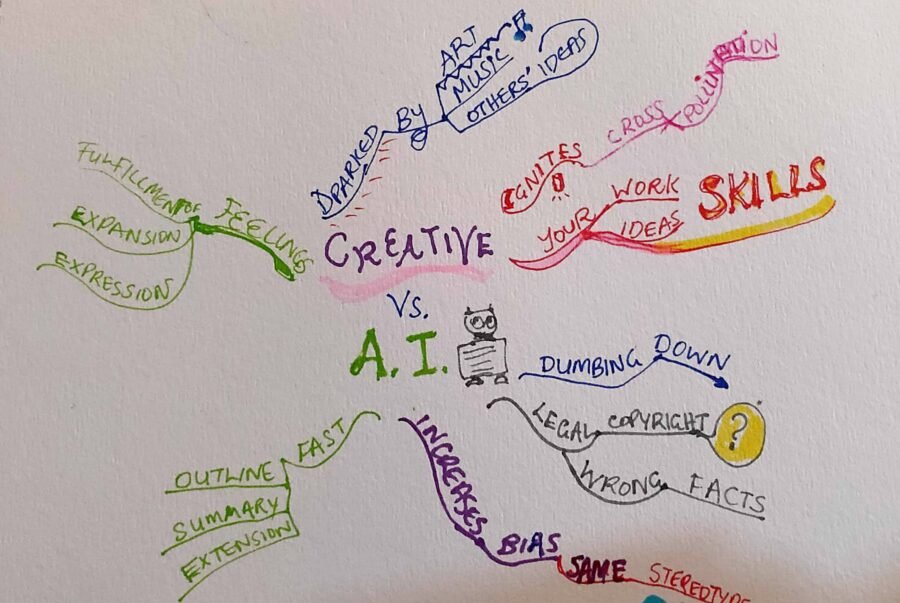
Mind Maps need not be perfect to be useful
STEP 3: OUTLINE
In Google Docs, it handily keeps an outline to the left as you get started with topics. In Word, you can start with a Table of Contents format from a book template. Remember your initial research as you begin to outline (expand) the sections. Think about what you have read and pick out the emotive points.
Keeping this outline to hand as you write will enable you to keep on track – a highly useful thing!
STEP 4: WRITE
After all your research and brainstorming, keep the topic starters (outline) to hand, but don’t worry over certain things. Don’t fuss on how it sounds, typos, or what other statistics or biography notes to put in the early part… just get writing and don’t look back!
In your introduction or preface, include your story of struggles and turning point and then what the key learning was from this.
You want to have momentum with a first draft. You can add more detail and check things in the self-edit. You might leave a gap if there is a diagram or model you want drawn, rather than fuss around drawing it and losing lots of time. I have a pyramid picture in my recent book and got a freelancer to make it rather than attempting it myself. Very quickly, it was done!
STEP 5: SELF-EDITING
It’s not just important to check your grammar. It’s also important to go back to see if the important questions the typical readers had (or the controversial topic you found) is still in your book. Is your main theme shining through, or is it getting a little lost? Time to keep picking up the thread and hit the promise that you made in your book purpose statement.
STEP 6: READER FEEDBACK
Your writer friends will help find loose threads and tell you if your theme has wandered. They may not know how to fix things, but if you instruct them well, they will be able to tell you if your theme is coming across. Some may say if your intended reader will be: a) intrigued/happy or b) put out.
STEP 7: TAKE A FRESH LOOK
When leaving the manuscript two weeks, your fresh eyes will be able to tackle those holes and problems with voice which your readers may have found. Voice consistency means you don’t write we, then you, then him/her. Get an editor’s help if unsure.
STEP 8: SEND TO EDITOR
Another big benefit to your back pocket is, if you’ve done these steps thoroughly, your manuscript may only need copy editing. Or if the structure is still a little wrong, at least you know it’s wrong and are seeking some advice on how to fix it.
Copy editing is much cheaper than structural (substantive editing), as it looks at the line-by-line errors.
STEP 9: INTEGRATE EDITORS’ COMMENTS
Now, if you have a sterling editor, then you will be made aware of the need to write an ‘about the author’ and ‘preface’ (about the book) section.
Copyright section: if self-publishing, you will also write this. If using Draft2Digital ebooks, then your About the Author and About the Publisher may go on the outside (in its interface).
Editors’ comments are usually based on grammar rules and sentence flow, so if you disagree about many of the changes, question whether this is because their formality level is different or their understanding of the book is different to yours.
Some editors are rigid, authors tell me, and some don’t look at the work as whole. As an editor, I believe that occasionally rules are made to be broken… if it suits the purpose of the work and reader needs. Some rules in grammar and spelling have become outmoded, so hiring someone up-to-date with these changes is ideal.
STEP 10: SEND FOR TYPESETTING
Book typesetting means such things as lining up bottoms, doing the best for widows/orphans, and ensuring balance when setting chapter heads. Unless you’re gifted at this yourself, or your first book is a simple one, then probably don’t attempt it.
I was a desktop publisher and I still forgot to justify the lines of my first book: a rookie error. In other novice books I have seen abhorrent line spacing (called ‘leading’), which must have been abysmal to read, although I did not buy said book.
It is another cost to bear, so if on a tight budget you can try the overseas book design freelancers with high ratings. Having outsourced it myself once, I can tell you that this path still meant later work for me, as the book turned up mightily unbalanced.
We now help authors to save precious time by utilising our management of book production and basics for book promotion.